Replacing Rainbird system
This page lists some instructions about replacing the common types of Rainbird system with Netro smart watering controller.
Example 1:
The common wires which should be connected to the C slots in Netro.
The Sprite controller does not need the ground wires. It does not need the rain sensor either. You can leave the M slot unconnected.
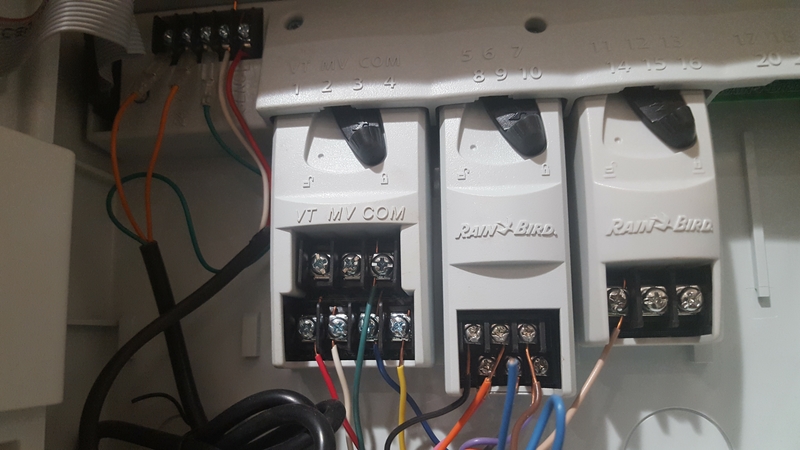
Example 2:
The COM wire goes to any C slot in Sprite.
The M slot will be empty because you do not have master valve.
The two red wires on the left go to the two 24 VAC slots.
Others are straightforward.
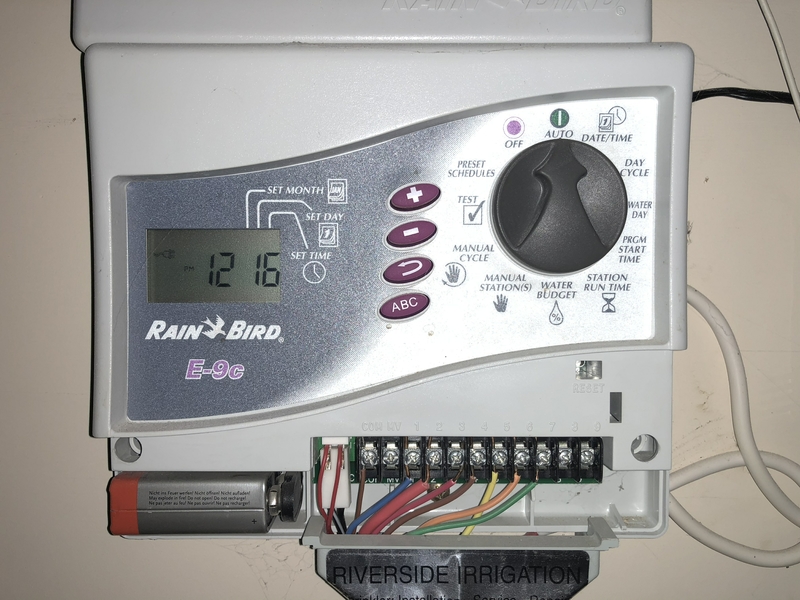
Example 3:
1. the COM wire in RainBird go to any of the C slots in Netro
2. The 1-6 zone wires in RainBird go to Slot 1-6 in Netro
3. Use the power adapter coming with the package for Netro
Other wires you can disregard them.
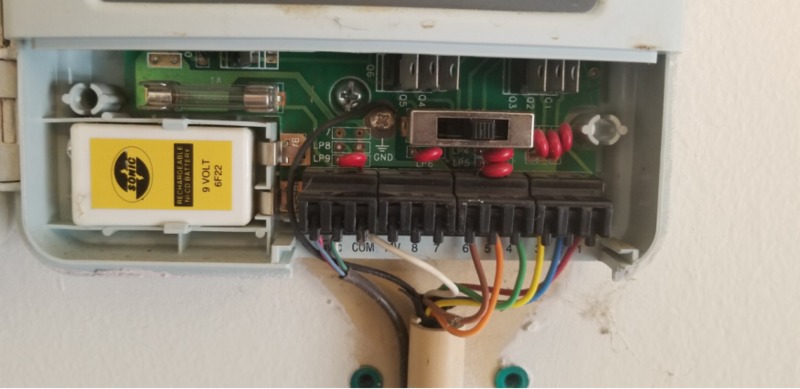
Example 4:
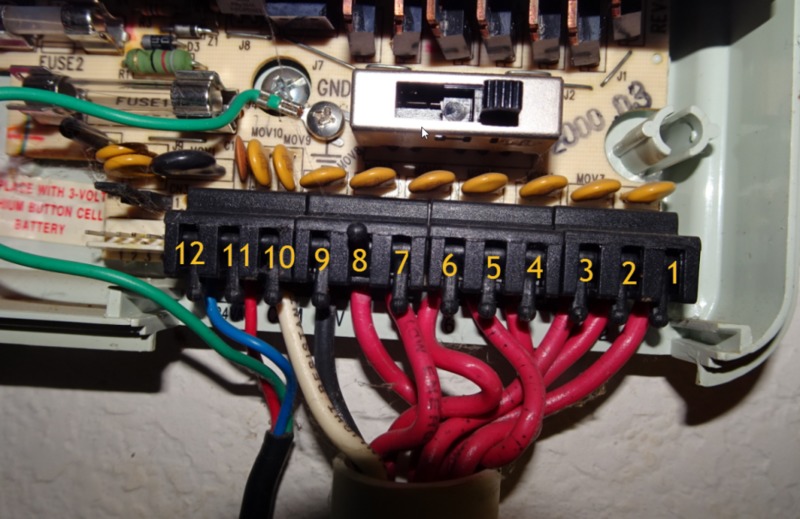
12(blue) and 11(red) go to the two AC slots on the right side for Netro. 10(white) goes to any one of the C slot in Netro. 9(black) goes to the M slot in Netro. 8-1(red) go the ZONES in Netro. You can leave the green wire (GND) open. The two leads from the power adaptor go to the two AC slots.